Hi all!
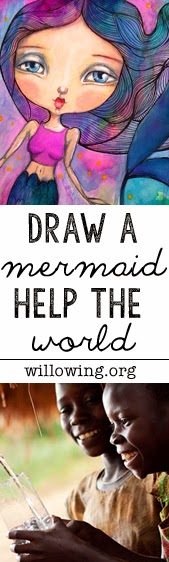
Wanted to share a link that if you decide to participate will donate money to a good cause AND get a cute class too! Willowing is a lady I LOVE to follow and when I get extra cash, take a class! If you click on this image below or the one I will place on the sidebar it will take you directly to her blog and the explanation of her project in detail. The bottom line is, make a donation to give someone access to clean water and get a free class to learn to draw this beautiful mermaid. I will be playing and will post the result of my mermaid attempt a later date :)
Monday, May 26, 2014
Sunday, May 25, 2014
It's About Quirky Time!
Time....
We all wish we had more.
I know I do!!!
This biweekly Quirky Crafts Challenge is about Time. We are using images provided to us by The Cutting Café. I really wanted to create a layered depth with this card, so I printed the Clock Background twice. One I punched out a few clocks and used it as a mask to spray some of the clocks darker. Then the rest of the image was sprayed with other shades of pink and gold. On top of that is adhered a vellum printed Time pdf. I believe the ribbon along the left is by Maya Arts.
It's About That Time is a package that has clock faces, circle greetings and standard greetings for various occasions. I adheared the cicle greeting and clock face to chipboard and sprayed them as well. Placed a large pink brad in the centre and then popped it up on the card front.
I have been trying to finish off the insides of the cards more lately. and so on the inside, scraps were used to create a focal point for one of the greetings. Have fun creating!
Tuesday, May 20, 2014
Peacock Reminder
Hi all!
How was your long weekend! My was good! So good, I forgot to post my reminder card. And I had it done ahead of time this time!!! So SORRY to Cazzy and all of you!
Quirky Crafts Challenges does a different challenge every 2 weeks and the current challenge "As Proud (and as beautiful) as a Quirky Peacock!" For this challenge we were sponsored by Stitchy Bear Stamps and I used one of the beautiful images by the artist Alipeeps and the background is by Mehendi.
I started by colouring the image with my markers and adding some shimmer with a metallic pen. I am not good at skin tones with my markers, so I did that part with my watercolour crayons and a water brush. I fussy cut her out after I was done.
I printed the background to 5x7" then trimmed it down to 4.5x6 and mounted it to my 5x6.5" card front. I cut a piece of vellum down to 4x5.5" and added this to the card. The fussy cut girl came next then the greeting by Dylusions was stamped with black Staz On. 3 teal pearls were added as a finishing touch and voila! I love images like this one!
Sunday, May 11, 2014
As Proud (and beautiful) as a Quirky Peacock
Hello all!
The challenge this time is Pretty as a Peacock at Quirky Crafts Challenge. We are being sponsored by Stitchy Bear this time around. They have a large list of artists that have various styles of their own. I've picked out an image by My Heart Pieces this time and come up with an easel card. The fun part is I used to be a design team member for My Heart Pieces and I played with this image before.
I coloured the image with my markers then cut it out using my Spellbinders Labels 20, carefully clipping around the tail. I used the large die from the same set to cut out a mat. I used one the backgrounds created by Coosty Creations printed at 5x7" and cut down to 4x6" and matted with teal cardstock cut to 4.25x6". The panel is adhered to a folded green card, making it an easel card. Along the folded bit holding up the easel is a strip of feathers sewn to a ribbon bought at Micheals years ago.
Check in next week for a different Peacock card!
Sunday, May 4, 2014
Reminder for S is For...
Hello!
I've been playing and getting some creativity back!
Today I'm showing a second card I made for Quirky Crafts Challenges. The image is from Bugaboo.
The image was coloured with Zig Wink of Stella and fussy cut out. The card is 5.5x6.5". The background was created on my Gelli plate. I adhered a strip of Maya Arts ribbon to mimic seaweed. Cool hum? I pop dotted the seahorse too.
I twisted the tail of the seahorse around the seaweed just as real seahorses do. The greeting was stamped with StazOn onto a scrap of painted paper and die cut with Spellbinders Labels 11, along with the glitter gold paper mat.
These are fun and quick images to play with! Go play!
Monday, April 28, 2014
Easter Gift
Hello!
Every once in a while I get the urge to do something I've seen someone else do. A friend posted a project on Facebook that I KNEW my sister would love and that I could handle re-creating.
I started with a piece of plumbing and added a layer of white primer paint.
Then a couple coats of the shimmer purple paint my sister selected. This was her Easter present this year and I was right.... she loved it!
Sunday, April 27, 2014
S is For...
Sunflowers!
Hi! The challenge for the next two weeks at Quirky Crafts Challenge is Something beginning with S... sea, sun, sunflowers etc. Bugaboo is sponsoring this round and I went with the obvious... Sunflower. I have decided to make a set of tags, one for each month to decorate my space and this image is the first to be used for this project.
I started with a large tag 4.25 x 8.5", large enough to give me room to play and use my favourite things. I took the top layer of napkins, tore them and adhered them to the tag using matte medium. I cut another tag the same size out of printed acetate by Creative Imaginations. I also wanted to use this flower I picked up at the re-use centre.
The image was printed and coloured using markers, then matted with a metal 4" square mat by Making Memories. I disassembled the flower and re-adhered it to the top right using glue dots to make sure it stayed stuck and to flatten it a bit too. The metal stamped August tag is from my stash and it was perfect for this project. Leaf eyelets, also by Making Memories, were used to attach the metal tag to the paper tag.
Finishing off the project, I used oval metal clips by Stampin' Up to help draw the eye and to hold the layers together. I like the layered depth to this piece!
Subscribe to:
Posts (Atom)
St. Patrick's Day and International Quilting Day!
Woohoo! Time for some green Quilts! LOL! Not often that these two days land on the same weekend. I finally finished one of my UFOs (unfinis...

-
Welcome!! I am proud to be part of my second 'Where Bloggers Create' . When I joined in last year I found some wonderful artists ...
-
Hello, Hello!!! Thanks for visiting my space today! Especially since today is Where Bloggers Create 2016! Thanks to Karen for hosting th...
-
This is the 4th year in a row that Karen has assembled a list of creative bloggers that wish to show off their creative spaces. I decided th...