Translate

Sunday, December 30, 2012

More Digi Darla's Angels

I love the images Digi Darla comes up with!  Easy to colour and fun.  In my last post I said I did a colouring experiment with her angel image and wanted to share the results.  I printed the image 4 times on a sheet and then took out my colouring tools... 
Started with my SU! markers on the top left image.  Top right image is done with watercolour crayons and paint brush.  Smoosh paint was used on the bottem left image and the bottem right is a combination of tools: watercolour crayons on the dress and hair.  Markers for the rest.  All 4 have clear Stickles on the wings. 

The top right image was used in my last post for the challenge.  The rest of the images follow:
 

Saturday, December 29, 2012

Digi Darla Challenge #43

Hello!

Hope you are getting some time off to play during this time between Christmas and New Year's!  I spent 5 hours yesterday and 5 today making cards!  I feel SO GOOD!!!  No doubt about it, I am a crafter. 

Today I am sharing my creation for Digi Darla's Peace on Earth with Ribbon Challenge.  I used Annie Angel 4 for this challenge and coloured her many ways, which I will show in my next post.  For this finished card though I coloured her with watercolour crayons and stickles on the wings. then cut her out with Spellbinders Label 20.  Cut a mat with white shimmer paper using the same label set.  Once I combined them I added fake pearls from the dollar store.  I folded an 8.5" square card in half and ran a white ribbon down the centre then placed my matted image on top.  Added a Wordsworth quote to the bottem right corner.  Hugs!

Monday, December 24, 2012

Christmas Cards

Merry Christmas Eve Everyone!
My sister just went home after an evening of finger food, laughs, gifts and a movie.  It occured to me I haven't shared my Christmas cards wth you!  I made up 60 for english family and friends, 16 for french family and friends and 15 for co-workers.  I usually pick one style and do about 100 assembly style, so that I remember what card I gave people each year, but this year decided to vary a bit.
I got busy with other projects this December though and these cards just got sent out today. Gotta get started earlier next year! Anyway, these are my final 2012 designs :) 


Thursday, December 20, 2012

Anything Goes!

This week at My Heart Pieces the challenge is "Anything Goes".  I chose one of Priyanka's newer images 'It's a Girl'.  It is similar to my last choice of It's a Boy.  I just love stuffed animals and babies. 

The first card is a baby girl card.  I don't have many occations to make these, but they are fun!  I fussy cut the image and coloured it in with my SU! markers.  I then adhered the image to a green piece cut with Spellbinders Labels 20 and embossed with Spellbinders Heart Embossing folder. This was then placed on top of a coral piece cut with Spellbinders Labels 23 and embossed the same.   The 5x 6 1/2" card was covered with SU! button fabric and then a 4 1/2 x 6" piece of white vellum.  A piece of knitted edged ribbon along the left side.  Then I placed my matted image centred on the card.  Final touches were a princess embossed bracelet along the bottem and a heart decoration in the top corner.

My second card has more to do with the Christmas season.... Baby's First Christmas.  The image is coloured with SU! markers and then simply cut square and matted.  On a white 5x 6 1/2" card front I placed two squares in the top left and bottem right.  I 'wrapped' them and then popped up the matted image in the centre of the card.  Cute and simple!

I wish all who celebrate a Merry Christmas, a Happy Hanukkah, Merry Eid, Joyous Kwanza and Happy Holidays!  Thank you for following me and I hope you get some time to create too!  Hugs!

Wednesday, December 12, 2012

Recycling Candy.... (boxes)

It's so busy getting ready for Christmas!  My cards are almost done...
I know leaving it to last minute are we??? :) 

Wanted to share with you another recycling project I worked on last month.  We do not have small kids with lunches so the only time we buy small packs of chocolate is at Halloween.  Since we only had 8 kids this year at the door, we had a fair amount of chocolate left over.  I emptied all the Smarties boxes into my bowl in my craft room and thought it was a shame to waste all these pretty boxes.  (I am to bright colours as some are to shiny and glitter) 
So cover an 8 1/2" x 11 sheet of cheap paper with sookwang sheets, then peal off to reveal the stickiness.  Place cut box sides to sheet in a fun pattern. 
When you run out boxes, go find other candy wrappers to use!
 
Voila!  Brightly coloured 'paper' ready to use in your cards! 
Here are a couple of the cards I created...
 
The best part is you can use any wrapping that you have alot of the same...  Granola Bars, gum wrapping, etc...


Thursday, December 6, 2012

Vibrant Colours

Hello All!

This week's challenge at My Heart Pieces is 'Vibrant Colors'.  I cannot think of anything more vibrant than baby boys' things.  Bright colours, wild combinations and fun!  I used one Priyanka's newer images 'It's a Boy' for this card.  Used my SU! dye markers to colour it all in, and used my Spellbinders to cut out the image and the two mats behind it.  Red twine wrapped around the left held my red tag stamped with Happy Birthday.  Numbered fabric tape along the bottem corner with a punched circle in red to highlight the '1'. 
 
I also created on that may not be as vibrant, but I love to make baby cards, so since this is a boy, I stuck with the blue/teal colour pallette.  Used blue and white twine to make it look like it was a picture hanging up on the blue button.
 
Have a great week and join us on this challenge if you have a chance to create!

Wednesday, December 5, 2012

Scraps

What to do with scaps after doing a project?  I tend to make multiples of a project like Christmas cards rather than do individual unique pieces.  I love unique cards, but as I send about 100 each year, I like to keep it an easy but elegant design that I can duplicate.  Anyway, this creates a lot of scraps of pretty paper I just cannot bear to throw away!  Shimmer paper is a weakness of mine and I just cannot waste any of it.  Check it out:
SO, I weave it, punch it and make all sorts of backgrounds for cards.
Have fun!

Monday, December 3, 2012

Occation Cards for Mom 3.0

I forgot to include some more of the all occation cards I made for my mom a couple months ago!  So here are samples of the last set I made for her.  I used Magenta stickers and paper.  Also used wrapping paper, velour paper, tea bag paper, SU! flowers and pearls.  Lots of fun!


Saturday, December 1, 2012

Mom's Christmas Card

What to post today????
Well I have my mom's Christmas cards...
Every year for a few years now, I create some Christmas cards for my mom to send to her family and friends.  She only sends out about 20-25, so it's an easily doable project for me.  This year she basically said you decide the theme and colours.  I knew mom was not a fan of overly religious cards, so I designed this for her.
We are a French Canadian bilingual family, so some of the cards were done in french in respect for those who do not speak alot of english. 

I'll post my Christmas cards a little later, after I have sent them out. :)

Thursday, November 22, 2012

Inspirational Photo Challenge

WOW! It's already been two weeks!  I've been busy making cards and scrapbooks for shows that my girlfriends and I were selling at.  I will show you some of those another day though. 

This week our challenge at My Heart Pieces is making a card using the following photo as inspiration.  As Priyanka put it: "you can make anything which is inspire you, it can be a teddy bear,red roses,the color of anything from the picture,ribbon, candle, pearls anything"  

I picked the image called 'Hide and Seek'  for the flowers which I saw in the picture... The red, blue and gold colours talked to me also.  I coloured all my images with water coloured crayons and a water brush.

So my first card is a 5x6.5" black card topped with gold Magenta mesh paper held in place with red flower eyelets.  The image was cut out with Spellbinders Labels 8, then layered onto a likewise cut blue panel with red ribbon accent.  Finishing touch is red flowers accented with white pearl centers.

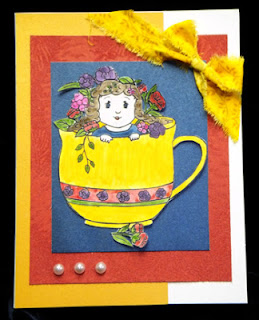
My second card is also 5x6.5".  I trimmed the image then matted it on dark blue, then on red.  The multicouloured paper on the right hand side is actually my scrap paper from cleaning my brush as I watercoloured the four images :)  Then I accented it with a yellow/gold fibre wrapped around a string of pearls.
 
My third card is also  5x6.5".  This time I tried cutting out my image and then matting on blue, then onto red flocked card, then on the card front with a piece of gold card tucked in between.  Then I tied a piece of gold fabric ribbon in a bow and adhered it to the top right corner.  And it really needed some pearl accents in the bottem left corner too!  Couldn't forget the pearls!
 
My last card is a 6x6".   I covered the card front with handmade paper that had a wide red ribbon placed on it.  I trimed the image and matted it on yellow then stuck it in the middle of the card.  And yes, I HAD to add the pearls again :)


Wednesday, November 7, 2012

Something Cute

Hi there!
This week at My Heart Pieces we are to make something cute.  I think Mermaids are cute!  And so this image was selected and coloured with my markers, twice, then one cut out.  Yes, her skin is blue.  I love the look of popping out a portion of an image to give it depth!  Dug around and found the small seashells I stole from my mom's collection and then added the gold negative sheet from making sequins. (I got it from my friend I have NO idea where to get more! LOL!)  It was a happy fluke that the paint chip I chose to use had the bottom colour listed as Ocean Sea!  Final card is 6x6".
 

Of course I had to keep making cards! :)
This one is also coloured with markers, then I believe it is called 'fussy cut' out the image with small scissors and a blade.  I wanted to show off the Alcohol ink background I cut out using Spellbinders Labels 20 then embossed with a shell pattern (that did not show up very well).  Placed this on blue mulberry paper then saw some pale blue netting out of the corner of my eye.  So I added it over the entire thing and secured with gold brads. Card size is 5 x 6 1/2".

And this last one I took my watercolour crayons and brush to.  Used my Spellbinders Label 22 to cut out the image then hand cut a thin mat onto metalic blue paper.  This is matted onto my girlfriend's hand made marble paper, then patterned vellum.  Nice and elegant, as well as cute!  Card size is 5 x 6 1/2".

Monday, October 29, 2012

Occasion Cards for Mom 2.0

As mentioned a couple days ago, my mom is my biggest fan (who's mom isn't?!) and so for her birthday I created a couple different batches of all occation cards for her to use.  This is the second batch of flower cards, this time using blue flowers stickers/ papers from Magenta.  Quick, simple and fun!

Saturday, October 27, 2012

Occasion Cards for Mom 1.0

My mom is my biggest fan (next to my husband) and so when her birthday comes along, I try to make her some cards she can use.  It's the only gift I can think of that doesn't create clutter and is useful.  These were done at the beginning of October in order for her to recieve them in time for her birthday.  I've been trying to use my stash of supplies and this was no exception.  The theme of this set was sunflowers.  My mom loves all kinds of flowers, so I tried to get creative. 
 
And this one has the added bonus of having my sister's art used as well.  A few years ago, my sister got some of her images made into stamps with Digital Princess Designs. 
 

Thursday, October 25, 2012

Use Ribbon

This week at My Heart Pieces the challenge is to use ribbon.  When I saw one of Pryanka's newest images I fell in love!  And when she announced the theme, I knew this was the image for me! 

I printed the image two times at 4x6" size.  I used one to cut out 3 spools in order to wrap ribbon and fibres around them.  My card was coloured using mainly my watercolour crayons with some markers for accents.

Then I adhered the popped up wrapped spools onto the coloured image and added buttons and needles where she had drawn them to add more dimension.  Man I love this card!  Finished card is 5x8.5".


Card #2 was the left over image from cutting out spools.  I coloured the image and used my Spellbinders Labels 20 to cut her out.  Layered her twice with misc papers, then placed on two ribbons glued down the centre of the card front.  Added buttons for accent and voila!  Finished card is 5x6".

Tuesday, October 23, 2012

Altered Tin

Every once in a while I get motivated to do other type of crafts.  Thanks to my girfriends at PMS (this is the name of our stamping club) I have learned the art of altering basic items.  This can be elaborate so that you do not recognise the original item, or just a basic alteration like I did today.  I took a basic Turtles tin and covered it with white Gesso to create a 'tooth' for my next steps. 

Then I covered the edges of the base with two coats of blue acrylic paint then used my sookwang tape to adhere a strip of blue glossy paper around the edge.

The lid, I applied a piece of mulberry paper with Mod Poge and then used Sookwank tape to adhere ribbon around the edge of the lid.

Finished decorated tin ready to store my new Gear Stamping tools!


St. Patrick's Day and International Quilting Day!

 Woohoo! Time for some green Quilts! LOL! Not often that these two days land on the same weekend. I finally finished one of my UFOs (unfinis...