Hello all!
In the middle of this flu, Jim and I were told of the death of his Aunty Olive. She was a neat lady! An adventurous classy woman who worked, traveled and never failed to spend time with her family which included us. When Jim and I were first engaged 20 years ago, she came down the following summer and did an 'inspection' of the woman her nephew had decided to add to the Connell family. We spent quite a bit of time talking and visiting Edmonton and when a routine call was placed to the patriarch of the family, I was surprised with her shouting to her older brother "She's a keeper Ken!" It still makes me smile today.
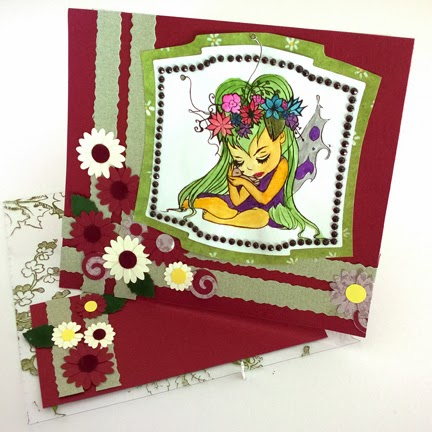
I don't know about you, but when given the news of a loss like this, I need to create. I put some classical music on the CD player, went through my stamps and supplies and picked out items that made me think of her. The result was this card I created and sent to her remaining brother and sisters.
The stamp set is a retired one from Stampin Up. I coloured the flowers with markers directly on the stamp, spritzed with water and stamped. Spritzed again and did another impression. I repeated the procedure for the opposite corner. The center of the lattice die was cut out to allow space for the greeting. I layered both of these onto printed vellum, then torn mulberry paper, then the 5x6.5" card front. The paper flowers were added and embellished by half pearls from Stampin Up. Simple and elegant, just like the lady.
Wednesday, March 12, 2014
Sunday, March 9, 2014
Flower Reminder Time!
Hello!
So... I've had the flu... AGAIN! Hope all of you are keeping healthy! This is a nasty one that is circulating this year....
I've created two more cards with more images provided by Unky. This time I got 'Hipster Goddess' and 'Aurora Cherry Blossom'. Every time I see an image fashioned from the 60s I think of my sister. Not because she is from that era (she's an 80s child) but her attitudes and beliefs are from that generation. Check out the Quirky Crafts Challenge for what the other ladies created!
This lovely image was coloured with my watercolour crayons and water brush then fussy cut. The papers are from a Michaels
paper pad called Boho Chic and I used my new Spellbinders Labels 25 to cut out the two mats the fussy cut image is placed onto. The 8x8 paper was folded in hald with a gap to the left that I placed another sheet of patterned paper. The final card is 5x8". Down the edge of the card I placed a strip of flower ribbon I purchased last year, then two metal peace symbols I've had in my stash for a while. The word 'love' (Dylusions) was stamped then outlined with a fine black pen to make it pop.
My second card is this lovely oriental lady. I have a HUGE appreciation for oriental art and dove into my supplies for this card. First I printed her twice onto cardstock, and once onto the flower washi paper her dress is made of. I used the Spellbinders Labels 20 to cut the cardtock version of the lady along with a mat out of paper from Graphic 45 Bird Song. I then cut out only the dress out of the washi paper and layered onto the cardstock image. I used my markers to colour the lady. The purple square paper is from a Walmart pad and then the whole thing is placed onto a 6" square folded black card. I finished off the card with flower petals off silk flowers I got at the re-use centre and in the centre is gold Candi.
Sunday, March 2, 2014
Secret Garden
Hello!
The challenge for the next two weeks is the Secret Garden. That is FLOWERS! Use lots of them! The image I was given to use is by Unky. She has beautiful images! Be sure to check her out. And when you have completed your card featuring flowers, upload it to Quirky Crafts Challenges for a chance to win some images of your choice!
I printed and coloured the image with watercolour crayons and a water brush. I added accents with the silver and purple Wink of Stella pens by Zig. The image was cut out using Spellbinders Labels 2 then accented with some Nestabling made for this die by Want 2 Scrap.
I used pieces from a layout swap I was part of to make the card base. I cannot remember the artist's name but she did a great job with the punch art flowers.
Finally I took a printed piece of acetate and trimmed a piece 5.5 x 12.75". Folded the hinge and then adheared the card front to the hinge. Other pieces from the kit were used on the inside to mat a future greeting and hold up the hinged card front.
Sunday, February 23, 2014
Quirky Crafts Challenge
Hi there!
Been watching the Olympic Gold medal Hockey game... WOO HOO Canada!!!!
Quirky Crafts Challenges is mid way in their two week Layers challenge. I was given a second image from Robyn's Fetish called 'Lambchop'. This image also spoke to paper piecing, but also embossing! I printed 4 copies of the images & used Stampin' Up's new Decorative Dots embossing folder to emboss and cut out 2 copies of the lamb. I used Labels 8 from Sellbinders to cut out one of the images, then sprayed it with Tattered Angels mists to give it a sky and grass.
The Xyron mini was used to adhere the layers of the lamb. Doesn't the embossing make her look fluffy?
I used my Stampin' Up markers to colour the flowers a few times and also pop dotted some of them to give more dimention. This layered layer was placed on a 5x6.5" card front covered with printed lamb paper by Karen Foster Designs. To add more dimention, I added a couple Garden Weave Corners by Spellbinders. The bottem corner now needed something...
The greeting is a die I purchased from Die-Versions called Everyday Compliments. The nice thing about this die is that you can clip letters as needed to make a custom greeting. I couldn't resist this pun :)
Been watching the Olympic Gold medal Hockey game... WOO HOO Canada!!!!
Quirky Crafts Challenges is mid way in their two week Layers challenge. I was given a second image from Robyn's Fetish called 'Lambchop'. This image also spoke to paper piecing, but also embossing! I printed 4 copies of the images & used Stampin' Up's new Decorative Dots embossing folder to emboss and cut out 2 copies of the lamb. I used Labels 8 from Sellbinders to cut out one of the images, then sprayed it with Tattered Angels mists to give it a sky and grass.
I used my Stampin' Up markers to colour the flowers a few times and also pop dotted some of them to give more dimention. This layered layer was placed on a 5x6.5" card front covered with printed lamb paper by Karen Foster Designs. To add more dimention, I added a couple Garden Weave Corners by Spellbinders. The bottem corner now needed something...
The greeting is a die I purchased from Die-Versions called Everyday Compliments. The nice thing about this die is that you can clip letters as needed to make a custom greeting. I couldn't resist this pun :)
Tuesday, February 18, 2014
Adding Stamping
Hi!
There are some people I know that add stamping to everything they touch, making their days crafty. I have to admit, I need to plan to do this. Partly because my stamps and such are in the basement and my every day living is upstairs :) We were sending my mom a smartphone she ordered and my husband configured for her. I figured new business cards were in order as she had to change her cell number. Not being able to find just the right image and knowing I had the right stamp to match her new case, I just printed her info, then sat down to stamp and colour the cards.
The image is the Cherry Blossom background by Local King Rubber Stamp, stamped with black Staz On ink. Interesting thing happened though. These new double sided business cards I picked up by Avery are coated in a kind of plastic. I got the black ink to stay, but when I used my markers to colour in the flowers and leaves, the black smeared! Don't quite get why this happened, but I will be careful if trying to do this again with these type of blank cards....
Hugs!
Sunday, February 16, 2014
Layers
Hello!
This is my first post as a Guest Designer for Quirky Crafts Challenges! You have until March 1 to post your project with the theme of 'Layers'. The challenge is being sponsored by Robyn's Fetish and I was given one of her images to play with. This 'Smart Owl' really tickled my owl fetish I've had lately :) I had this paper from Kaisercraft called 'What a Hoot' that I had picked up because I LOVED it but no plans. This image gave me a plan to do with it. I started off by printing 4 copies of the image onto copic paper, about 3" square (the nice thing about digi images... you can resize to your use!)
I coloured the images with my Stampin' Up markers, then cut out layers from two of them. Once finished colouring, I cut out a full image with Spellbinders Labels 2. The spare image was roughly cut out and used as a mask to cover the colouring and then sprayed with Lindy's Stamp Gang: Treasure Island Turquoise.
I covered a card front with a 5x6.5" piece of the pattered paper, then a 4.5x6" of the reverse side. The ribbons running down the side are from Magenta and Maya Arts. The die cut image was matted with a piece of the same paper then pop dotted onto the front of the card. The pieces I cut out of the other coloured images were then pop dotted on top of the main image.
Finishing touches include the 'Thanks' stamp by Stampin' Up, White Zig Wink of Stella brush on the glasses and a couple of green plastic squares from my kit.
Friday, February 14, 2014
Valentine 5.0
Happy Valentine's Day!!!
I hope you are able to do something special with someone you love today! Be it a significant other, a friend, your kids, your parents or hey! How about yourself!?
I made this card a while back and saved it for today.
The card is 6x12" Die Cuts With a View green shimmer paper folded in half and the front hand cut into a heart shape. I placed a 6x6" piece of Life's Journey paper by K&Co. on the inside and then free cut a heart shape for the front.
The image is one from Whimsy Stamps called Hopeful (Wee Stamps collection). I coloured her with my SU! markers then fussy cut her out.
Then I started layering... In the center is a Mrs. Grossman Grapevine Wreath sticker, then I placed my coloured image. I stamped then punched out the 'Love' seal (also from Whimsy Stamps) and adhered it to the top right.
Final touches include heart shaped charms and white cord.
Have a great day! Hugs!
Subscribe to:
Posts (Atom)
St. Patrick's Day and International Quilting Day!
Woohoo! Time for some green Quilts! LOL! Not often that these two days land on the same weekend. I finally finished one of my UFOs (unfinis...

-
Welcome!! I am proud to be part of my second 'Where Bloggers Create' . When I joined in last year I found some wonderful artists ...
-
Hello, Hello!!! Thanks for visiting my space today! Especially since today is Where Bloggers Create 2016! Thanks to Karen for hosting th...
-
This is the 4th year in a row that Karen has assembled a list of creative bloggers that wish to show off their creative spaces. I decided th...