As mentioned a couple days ago, my mom is my biggest fan (who's mom isn't?!) and so for her birthday I created a couple different batches of all occation cards for her to use. This is the second batch of flower cards, this time using blue flowers stickers/ papers from Magenta. Quick, simple and fun!
Monday, October 29, 2012
Saturday, October 27, 2012
Occasion Cards for Mom 1.0
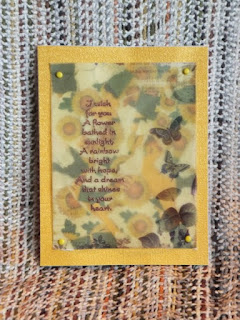
My mom is my biggest fan (next to my husband) and so when her birthday comes along, I try to make her some cards she can use. It's the only gift I can think of that doesn't create clutter and is useful. These were done at the beginning of October in order for her to recieve them in time for her birthday. I've been trying to use my stash of supplies and this was no exception. The theme of this set was sunflowers. My mom loves all kinds of flowers, so I tried to get creative.
And this one has the added bonus of having my sister's art used as well. A few years ago, my sister got some of her images made into stamps with Digital Princess Designs.
Thursday, October 25, 2012
Use Ribbon
This week at My Heart Pieces the challenge is to use ribbon. When I saw one of Pryanka's newest images I fell in love! And when she announced the theme, I knew this was the image for me!
I printed the image two times at 4x6" size. I used one to cut out 3 spools in order to wrap ribbon and fibres around them. My card was coloured using mainly my watercolour crayons with some markers for accents.
Then I adhered the popped up wrapped spools onto the coloured image and added buttons and needles where she had drawn them to add more dimension. Man I love this card! Finished card is 5x8.5".
Card #2 was the left over image from cutting out spools. I coloured the image and used my Spellbinders Labels 20 to cut her out. Layered her twice with misc papers, then placed on two ribbons glued down the centre of the card front. Added buttons for accent and voila! Finished card is 5x6".
Tuesday, October 23, 2012
Altered Tin
Every once in a while I get motivated to do other type of crafts. Thanks to my girfriends at PMS (this is the name of our stamping club) I have learned the art of altering basic items. This can be elaborate so that you do not recognise the original item, or just a basic alteration like I did today. I took a basic Turtles tin and covered it with white Gesso to create a 'tooth' for my next steps.
Then I covered the edges of the base with two coats of blue acrylic paint then used my sookwang tape to adhere a strip of blue glossy paper around the edge.
The lid, I applied a piece of mulberry paper with Mod Poge and then used Sookwank tape to adhere ribbon around the edge of the lid.
Finished decorated tin ready to store my new Gear Stamping tools!
Sunday, October 21, 2012
Hello!
I love the fall season, but there are times the fall season does not like me! Bad week for my fibromyalgia symptoms, but a great week otherwise! Some time with friends, starting a new job and generally thankful for my health dispite my limitations!
These are two cards I created a month ago 'cause I felt like it! I love this image from Digi Darla and it was quick to colour up and make into bright 'hello' cards! Just coloured in with my SU! markers, matted in bright blue, then placed on a green 4.25x5.5" card base. I placed a similar coloured ribbon behind the matted image, then used the same colour cardstock inside the card for accent.
These are two cards I created a month ago 'cause I felt like it! I love this image from Digi Darla and it was quick to colour up and make into bright 'hello' cards! Just coloured in with my SU! markers, matted in bright blue, then placed on a green 4.25x5.5" card base. I placed a similar coloured ribbon behind the matted image, then used the same colour cardstock inside the card for accent.
Saturday, October 13, 2012
Christmas Season Coming!
My girlfriends and I at Waddle Waddle Art have been working on new albums and cards getting ready for our next show on November 18! Come out and join us and see what's new! Admission is free with a donation for the food bank.
Thursday, October 11, 2012
Monochromatic
I LOVE this kind of challenge! Most of my cards tend to lean towards monochomatic, or two colours... But this week My Heart Pieces has challenged us to create a monochromatic card with one of her images. I chose Noyontara for these cards. As usual 4 cards were created as I was on a roll. I also used markers to colour the images (watercolour for the skin) and my Spellbinders for layers.
First up is the yellow family. I used Labels 8 to layer the handmade paper and cardstock under my image. She was coloured with markers then cut out. These were then layered onto origami paper on a 6" square card. I embellished it with a stip of fabric and a couple yellow daisies I rescued at the re-use centre.
I Love Asian themed cards too and so the colour red came to mind for this image. After colouring her in used Labels 2 to cut her out along with the red mulberry and origami paper. Then layered onto another origami paper, red cardstock and again the red mulberry. Finished card is the usual 5x6.5". The chop at the bottem is a sticker from my stash.
Last up is green. I was suddenly inspired when I saw the pre cut window card front for Magenta. Thought she'd look cute peeking out the window and I was right! Just cut her out and positioned her. Then added Magenta velum paper behind and added a preprinted green flower tag from my stash and stamped 'Hello' (Digital Princess Designs) on it. Simple, quick and cute!
Saturday, October 6, 2012
Add a Little Sunshine
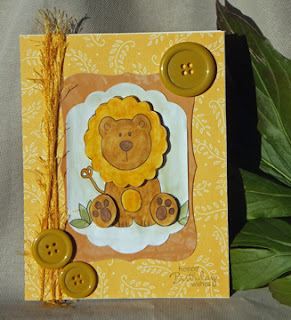
Just under the wire I present my submission to Digi Darla's weekly challenge 'Add a Little Sunshine'. I love this little lion and ended up making 3 cards. :) My submission is this first card. I printed 2 images and coloured them both with my watercolour crayons. Then I cut the head and paws out to pop over the other image. I cut out the image out with Layers 11 die then placed it on a cut out from Layers 8. These were placed onto 5x6.5" card front. Used fibres and buttons to accent it and the stamp used is SU!
I dug into my scrapbook supplies for this next card. Again Leo was coloured with watercolour crayons then cut out. I placed him onto multiple layers of scrapbook paper, then onto a 6x6 green card base. the tree die cut is from Handmade Scraps and this one is the Summer Tree. Along the bottom is a leaf ribbon. I used the Petite Scallop circles to cut out the Thanks stamp (SU!)
And the third card is inspired from Digi Darla's last week challenge. A circle card. Just this cuttie coloured with watercolour crayons then cut out with my circle cutter. Layered him onto another circle, then another, tucking in leaves here and there for effect. Then finally onto a 6" circle card base.
Subscribe to:
Comments (Atom)
St. Patrick's Day and International Quilting Day!
Woohoo! Time for some green Quilts! LOL! Not often that these two days land on the same weekend. I finally finished one of my UFOs (unfinis...

-
Welcome!! I am proud to be part of my second 'Where Bloggers Create' . When I joined in last year I found some wonderful artists ...
-
Hello, Hello!!! Thanks for visiting my space today! Especially since today is Where Bloggers Create 2016! Thanks to Karen for hosting th...
-
This is the 4th year in a row that Karen has assembled a list of creative bloggers that wish to show off their creative spaces. I decided th...


